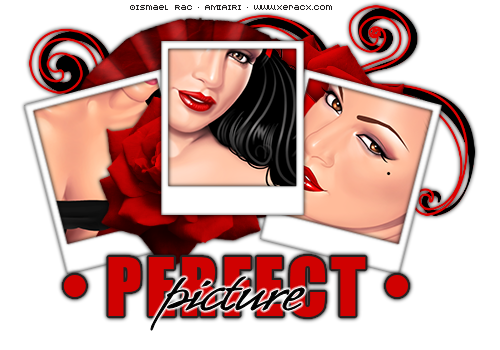
:::Picture Perfect:::
Tut written by Juicy Bits Dec 14, 2009. This tut was written PSPX2 and is written for those
familiar with the workings and language of PSP tutorials.
familiar with the workings and language of PSP tutorials.
- Supplies -
My Template HERE.
2 - 3 Tubes by Ismael Rac at AMI
Vinyl Vixen by me
(You will need - (1) Flourish (1) Flower, (1) Fan, and any other elements you should desire to use)
- Instructions -
1) Open up your supplies and minimize them. Open up a new 500x 350 image.
2) Go to your polaroid template. Go to the frame layer. Copy and then go to your blank image and paste as a new layer. Name this layer Frame A.
Resize as desired (I smart sized that layer only by 40%). Duplicate the frame A layer.
Name the duplicate, Frame B Drag the Frame B layer so that is beneath your frame A layer. Now rotate and place as desired.
When you are ready. Duplicate the Frame B and Mirror. Name this layer Frame C.
3) Go to the layer below Frame A and add a new raster layer. Now go to your Frame A and with your magic wand click inside the polaroid picture box.
Expand your selection by 3. Go to the empty layer below and flood fill this selection with a color from your tube.
This will be the background for your polaroid.
4) Repeat this process for Frames B & C or you can simply duplicate your polaroid background twice and position them for Frames B & C.
5) Now go to the background layer for Frame A. Paste tube and place as desired. Give it a drop shadow. Return to the background layer.
Use your magic wand to select it. Now go to your tube layer and invert selection. Hit delete.
Do this same process for Frames B & C
6) You should now have three picture frames with backgrounds and tubes framed in each of them.
Give each of your polaroid frames the drop shadow of choice.
7) Go to your very BOTTOM layer (It should be empty - or floodfilled white if you chose to do that)
Paste your flourish as a new layer.
Resize and place as desired. Add desired drop shadow.
8) Paste your fan as a new layer. Place, Rotate and resize as desired. Add desired drop shadow.
9) Now paste your flower as a new layer. Resize and place as desired (I placed mine ever so slightly above the polaroid on the left side.
Duplicate this layer and drag it so that it is directly below your Frame A background layer. Now resize *if desired* and place.
As you can see from the tag I placed mine so that it is sticking out from behind Frame A.
Give both of these flower layers the drop shadow of choice.
10)Add your credits and desired text. Merge visible and save as a PNG.
Enjoy!
Tut by ©JuicyBits 2009. Any similarity is purely coincidental. Do not redistribute or claim as your own.Copying or 'Reproducing' and claiming as your own tut is STEALING and ILLEGAL.







No comments:
Post a Comment