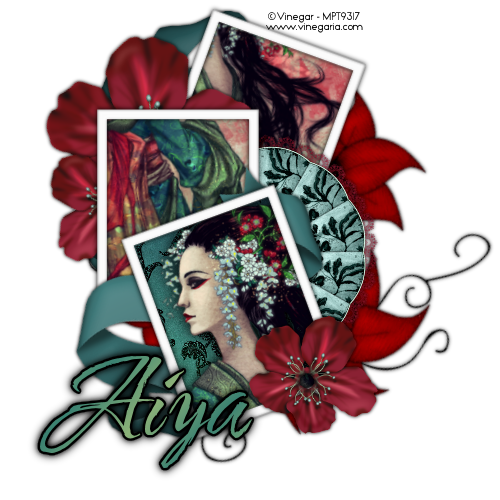
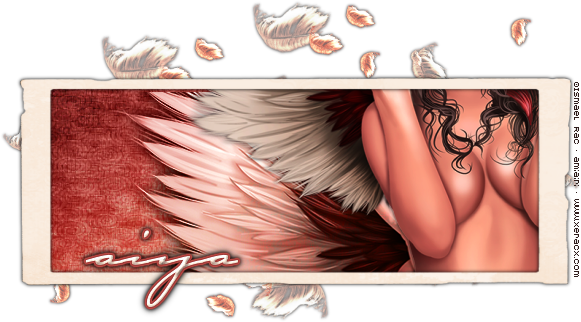
Wednesday, December 16, 2009

:::Pretty Juicy:::


:::Pretty Juicy:::


Tut written by Juicy Bits Dec 17, 2009. This tut was written in PSPX2 and is written for those familiar with the workings and language of PSP tutorials.


- Supplies -
Close Up & Tube by Ismael Rac at
AMI
Juicy Kit by Me
(You will need (1) Frame, (1) Paper, (2-4) Flowers & Alpha Set)
Mask of Choice


- Instructions -


1) Open supplies and minimize. Open a new 500 x 500 image.


2) Paste your paper as a new layer. Resize if desired.


3) Paste your frame as a new layer. Resize as desired.
Take your magic wand and select the area inside the frame.
Expand your selection by 4.
Go to your paper layer. Invert selection and hit delete.
(You may also omit your paper layer all together for a unique look - This looks especially well when saved as a PNG)


4) If you chose to omit your paper layer please skip this step.
Paste your close-up as a new layer. Mirror Image and place as desired. Duplicate layer.
Set Duplicate layer blend mode to Multiply - Opacity 60.
Return to Original Close up. Set blend mode to Luminance. Add Shadow.
Go to your paper layer. Select all/float/defloat. Go to your Shadowed Close Up and invert selection. Hit delete.
Without altering selected layer, go to your Duplicate Close Up layer and hit delete.
Merge the Luminance Close Up To Paper. THEN merge the Mutiply Close Up layer to the paper layer.


5) Go to Frame Layer. Place tube as new layer. Place and resize as desired.
Duplicate layer and set duplicate to blend mode Multiply - Opacity = 60.
Merge "DOWN". Duplicate this layer and drag the duplicate to rest directly below the frame.
Go to your top Tube layer and give desired shadow.


6) Give your frame layer and add drop shadow.
Return to top tube layer and erase all "overhang" so that the tube appears to "come out of" the frame.


7) Go to your empty bottom layer. Paste your flowers as new layers. Resize and place as desired or use my tag as a guide.
Add desired shadows and merge down on top of each other.
Repeat this process for your top layer (tube).


8) Select two colors from your tube. Set one of your color selections to Gradient (Foreground/Background). Radial - Repeat = 7.
Go to your bottom empty layer. Floodfill with your gradient.
Apply mask of choice.


9) If you intend on resizing your tag, do so now. Add copyrights.
Use your alpha to apply desired text.
Merge Visible & Save as PNG.


Enjoy!


Tut by ©JuicyBits 2009. Any similarity is purely coincidental. Do not redistribute or claim as your own.
Copying or 'Reproducing' and claiming as your own tut is STEALING and ILLEGAL.


• • • • • • • • • • • • • • • • • • • • • • • • • • • • • • • • • • • •

Tuesday, December 15, 2009

:::Geisha:::


:::Geisha:::

Tut written by Juicy Bits Dec 15, 2009. This tut was written in PSPX2 and is written for those familiar with the workings and language of PSP tutorials.


- Supplies -


Image & Tube by Vinegar at MPT

My frame HERE.


(You will need, (1) Paper, (1) Ribbon, (1) Fan, (1) Flower, (1) Flower Cluster (Flower07)


- Instructions -

1) Open your supplies and minimize. Open the frame template I have supplied for you. Shift-D. Close your original.


2) Resize the backing and frame layers by 50% (make sure your 'resize all layers' is NOT checked)


3) Duplicate each of these layers twice. Designate one set as "2" and the other duplicate set as "3".
Make sure your original layers are at the top. *Backing still beneath the frame.
Arrange each of these sets as desired. See tag for my arrangement. (I rotated left and right by 20%)

4) Go to the backing layer at the bottom. Paste your image as a new layer.
Rotate and place as desired. Go to backing layer. Select all/float/defloat. Return to image.
Invert selection and hit delete. Repeat the process for the backing layer in the middle.

5) Go to your top backing layer. Paste the paper of choice as a new layer. Go to top backing.
Select all/float/defloat. Return to paper. Invert selection and hit delete.


6) Paste your tube as a new layer. Arrange as desired and give desired shadow. Go to top backing.
Select all/float/defloat. Return to tube. Invert selection and hit delete.


7) Go to your bottom frame layer. Paste ribbon as a new layer. Resize and place as desired.
Duplicate your ribbon and move duplicate layer to just below your top backing (Backing1).
Resize and arrange as desired. Add drop shadow to both ribbon layers..

8) Paste your fan as a new layer. Rotate, resize, and place as desired. Add drop shadow.

9) Paste your Flower Cluster. Rotate, resize and place as desired. Add drop shadow.


10) Go to your bottom Frame. Paste your flower as a new layer. Resize but keep rather large.
Duplicate the layer. Resize to a smaller size and place slightly staggered from the larger flower.
Duplicate this layer and send to the top. Place in the corner or as desired.
Add shadows to all three of these layers.


11) Add desired shadows to your three frame layers. Merge Visible. Resize if desired.


12) Add credits and desired text. Merge Visible and Save as PNG


Enjoy!


Tut by ©JuicyBits 2009. Any similarity is purely coincidental. Do not redistribute or claim as your own.
Copying or 'Reproducing' and claiming as your own tut is STEALING and ILLEGAL.

Monday, December 14, 2009

:::Angelic:::


:::Angelic:::


Tut written by Juicy Bits Dec 14, 2009. This tut was written in PSPX2 and is written for those familiar with the workings and language of PSP tutorials.


- Supplies -

Close Up & Tube by Ismael Rac at AMI

Angelic Kit by Me

(You will need (1) Frame, (1) Paper & Feathers)


- Instructions -


1) Open your supplies and minimize.


2) Go to your frame and hit Shift-D. Close your original.

Rotate Left (or Right as desired). Resize as desired. Make sure "Resize All Layers" is NOT checked.

Or resize by hand as I did to create a thinner frame.

Place so that there is far more towards the bottom than the top.


3) Add a new raster layer and send to bottom. This will be your background/bottom layer.


4) Paste your paper as a new layer. Go to your frame and with your magic wand click inside the frame and expand your selection by 3.

Return to your paper. Invert the selection and hit delete.


5) Paste your close up as a new layer. Arrange it as desired. Add desired shadow.

Set blend mode to luminance. Go to your paper, select all, float, defloat. Return to close up. Inver selection and hit delete.


6) Paste your regular tube as a new layer. Place as desired. - See tag for my option -


7) Duplicate this layer. Set duplicate layer blend mode to Multiply with an opacity of 61. Merge down.

Give desired shadow.


8) Go to your paper layer. Select All/Float/Defloat Go to your tube layer. Invert selection and hit delete.


9) Go to your background layer. Paste feathers as a new layer.

Resize, duplicate, arrange as desired. Add a soft shadow if desired. Merge Visible.


10) Resize canvas size if desired. Add copyrights and desired text. Save as PNG.


Enjoy!


Tut by ©JuicyBits 2009. Any similarity is purely coincidental. Do not redistribute or claim as your own.
Copying or 'Reproducing' and claiming as your own tut is STEALING and ILLEGAL.


:::Mirror Mirror:::


:::Mirror Mirror:::

Tut written by Juicy Bits Dec 14, 2009. This tut was written PSPX2 and is written for those familiar with the workings and language of PSP tutorials.


- Supplies -


My template HERE.

Close Up Tube by Ismael Rac at AMI

Eye Candy Gradient Glow Filter (optional)

Soiree Kit by Me

(You will need (4) papers, Glitter Splatters of choice, (1) Bracket Back, & (1) Flourish)


- Instructions -


1) Open up your supplies and minimize. Open your template and Shift-D. Close the original. Hide your Background layer.


2) Go to your Frame Back Layer and Paste your tube as a new layer. Arrange as desired. Duplicate the layer.
Pull your duplicate layer below the original tube layer.
From there mirror and flip your image. Set your duplicate layer Blend Mode - Luminance.


3) Add shadow to your tube layers. Go to your Frame Back Layer.
You may choose a color from your tube and floodfill the space or leave it gray for a grayed appearance.
Select All Float and Defloat. Go to your luminance tube layer and invert the selection. Hit Delete.
Invert the selection again. Go to your original tube layer and invert selection. Hit delete. Select None.


4) Merge the luminance tube layer down to the Frame Back layer. Then merge the original tube layer down.

(If you merge the tube layers together before merging it to the frame back layer you will end up with Two tubes in luminance)


5) Select a color from your tube and fill the Frame in the Frame Layer.


6) Go to your scallop frame and paste the first paper of your choice as a new layer.
Resize if you like. Go to the scallop frame and float/defloat that layer.
Go to the paper layer and invert selection. Hit delete. Go to scallop frame layer.
Hit delete. Merge your paper frame down to the scallop frame layer.


7) Recolor your dotted squares as desired using the Adjust Hue/Saturation/Lightness tool.


8) Go to your bracket layer. Paste your bracket back of choice (or another paper if you'd prefer that).
Go to your bracket layer and float/defloat.
Go to your bracket/Paper layer, invert selection, hit delete.
Go to your texture effects and add weave with the settings (Gap - 1; Width - 3; Opacity - 1) Make sure your gap color is either lighter or darker than a color in your tube.
I used black.


9) Go to your Long Tag Layer (The completely vertical layer) Paste the paper of your choice as a new layer.
Go to the tag and float/defloat.
Go to your paper and invert the selection. Delete.
Do this for the other Long Tag layer as well.


10) Repeat this same process for your wave, circles and tag layers.
You may also choose to simply recolor the layers with your hue/sat/lightness
tool instead of using papers.


11) Go to your background layer. Paste your flourish as a new layer. Rotate and resize as desired.
You may also duplicate, mirror and flip if desired.


12) Return to background layer. Paste glitters as new layers and arrange, resize as desired.


13) Add your glow to any desired layers EXCEPT your glitters. Those add desired shadow to.

Add desired shadows to any layers you wish after you've "Glowed" them up...


14) Resize ALL now if so desired. Add copyrights and desired text. Merge Visible.

Delete any hidden layers. Save as PNG.


Enjoy!


Tut by ©JuicyBits 2009. Any similarity is purely coincidental. Do not redistribute or claim as your own.

Copying or 'Reproducing' and claiming as your own tut is STEALING and ILLEGAL.

:::Picture Perfect:::

:::Picture Perfect:::
Tut written by Juicy Bits Dec 14, 2009. This tut was written PSPX2 and is written for those
familiar with the workings and language of PSP tutorials.
- Supplies -
My Template HERE.
2 - 3 Tubes by Ismael Rac at AMI
(You will need - (1) Flourish (1) Flower, (1) Fan, and any other elements you should desire to use)
- Instructions -
1) Open up your supplies and minimize them. Open up a new 500x 350 image.
2) Go to your polaroid template. Go to the frame layer. Copy and then go to your blank image and paste as a new layer. Name this layer Frame A.
Resize as desired (I smart sized that layer only by 40%). Duplicate the frame A layer.
Name the duplicate, Frame B Drag the Frame B layer so that is beneath your frame A layer. Now rotate and place as desired.
When you are ready. Duplicate the Frame B and Mirror. Name this layer Frame C.
3) Go to the layer below Frame A and add a new raster layer. Now go to your Frame A and with your magic wand click inside the polaroid picture box.
Expand your selection by 3. Go to the empty layer below and flood fill this selection with a color from your tube.
This will be the background for your polaroid.
4) Repeat this process for Frames B & C or you can simply duplicate your polaroid background twice and position them for Frames B & C.
5) Now go to the background layer for Frame A. Paste tube and place as desired. Give it a drop shadow. Return to the background layer.
Use your magic wand to select it. Now go to your tube layer and invert selection. Hit delete.
Do this same process for Frames B & C
6) You should now have three picture frames with backgrounds and tubes framed in each of them.
Give each of your polaroid frames the drop shadow of choice.
7) Go to your very BOTTOM layer (It should be empty - or floodfilled white if you chose to do that)
Paste your flourish as a new layer.
Resize and place as desired. Add desired drop shadow.
8) Paste your fan as a new layer. Place, Rotate and resize as desired. Add desired drop shadow.
9) Now paste your flower as a new layer. Resize and place as desired (I placed mine ever so slightly above the polaroid on the left side.
Duplicate this layer and drag it so that it is directly below your Frame A background layer. Now resize *if desired* and place.
As you can see from the tag I placed mine so that it is sticking out from behind Frame A.
Give both of these flower layers the drop shadow of choice.
10)Add your credits and desired text. Merge visible and save as a PNG.
Enjoy!
Tut by ©JuicyBits 2009. Any similarity is purely coincidental. Do not redistribute or claim as your own.Copying or 'Reproducing' and claiming as your own tut is STEALING and ILLEGAL.


My name is Aiya. I've been psping for about 4 years. I'm currently creating exclusive scrap kits at AMI.
I also design for my own store Juicy Bits, as well as Twilight Scraps & Scrappetizing.
Below, you can find links to these stores as well as my blog.
If you'd like to contact me, please email me at myjuicybits@live.com.


Fanatics, Stalkers & Other Fab People